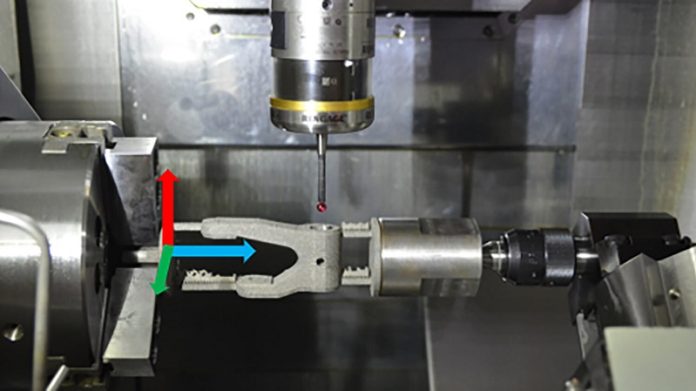
Researchers at North Carolina State University have created an innovative technique that significantly speeds up the quality control process for 3D printed metal machine parts.
This new method allows manufacturers to detect flaws and ensure parts meet precise measurements without removing them from the manufacturing equipment, thus saving valuable time.
“One of the main advantages of 3D printing and other additive manufacturing technologies is their ability to quickly produce essential machine components that are otherwise hard to make,” says Brandon McConnell, co-author of a paper on this work.
McConnell is an assistant research professor in NC State’s Edward P. Fitts Department of Industrial and Systems Engineering.
Traditionally, once a metal machine part is 3D printed, it needs additional finishing and must be measured to meet critical tolerances, meaning every dimension of the part must be exactly right.
This usually involves removing the part from the equipment, measuring it, and then putting it back to make adjustments, a process that may need to be repeated multiple times, consuming a lot of time.
“Our work here speeds up that process,” McConnell says.
The researchers have integrated several technologies—3D printing, automated machining, laser scanning, and touch-sensitive measurement—into a largely automated system that produces metal machine components with precise tolerances.
Here’s how the system works:
When a specific part is needed, users access a software file with the exact measurements of the part. A 3D printer then uses this file to print the part, including necessary metal support structures. The printed part is then mounted in a finishing device using these support structures.
At this stage, lasers scan the part to determine its dimensions. A software program uses these dimensions, along with the desired tolerances, to guide the finishing device, which polishes out any irregularities in the part. As the process continues, the finishing device adjusts the part’s orientation so that a touch-sensitive robotic probe can measure it, ensuring the dimensions are within the required parameters.
To test their new approach, researchers compared the finishing time of a machine part using conventional techniques versus their new method. They found that the conventional method took 200 minutes, while their new technique finished the same part in just 133 minutes.
“Saving 67 minutes can be incredibly important. In most professional settings, time is money. In emergency situations, it could be the difference between life and death,” McConnell explains.
Although this research focuses on parts with circular or cylindrical features, such as pistons, the technique could be adapted for other types of machine parts.
“All of the hardware used in this technique is commercially available, and we clearly outline the necessary software in the paper.
This means the new approach could be adopted and put into use almost immediately,” McConnell says. “We are also open to working with partners interested in using this technique in their operations.”
The research paper, “Automatic Feature Based Inspection and Qualification for Additively Manufactured Parts with Critical Tolerances,” is published in the International Journal of Manufacturing Technology and Management.


